
By Princess Jones
Feedback is incredibly important for any small business. You may have your big vision of where your business should go, but if you want to be successful, you have to take direction from your consumers. Feedback can come in a variety of forms — reviews, comment cards, verbal confirmation, etc. But if you want regular feedback from you customers, you’ll need to be proactive about collecting it.
Google Forms is a free online option for capturing data. You can send these surveys after purchases or as yearly thing. You can ask as many questions as you’d like and be as specific or as open as you’d like about the feedback you’re looking for. It’s all up to you.
Setting It Up
Start by going to Google Forms. (You’ll have to sign in with your Google account if you haven’t already done so.) At the top of the screen, you’ll see an option labeled “Blank” with a plus sign. Click that.
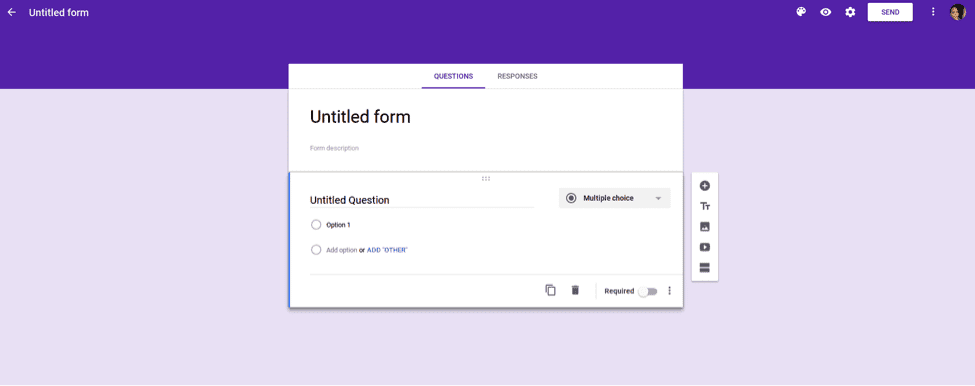
Type in the title of your survey where the words “Untitled form” are. (Just point your mouse there and start typing. It will overwrite the words already there.) In the space below, put a little something about the purpose of the survey. It doesn’t have to be much. You just need to give your consumers a little description.
At the top of the screen, you’ll see a paint palette icon that allows you to change the color scheme or background image of the form. Next to that is an eye icon that shows you the preview of the final form if you click it. And the wheel icon allows you to change the settings like whether you’re going to collect email addresses, whether respondents can see a summary of the responses, and whether you’d like to turn on quiz mode.
On the right side of the screen, you have sidebar full of controls. There’s a plus sign for adding a question, an uppercase and lowercase letter T for adding a header and description, and a picture icon for adding an image. You can also add video and sections. You really have all the options in the world for creating a form.
When it comes to building your questions, start by clicking that plus sign on the right side of the screen. Just type in the question you’d like to present to your customers. On the right side, you’ll see that it’s set to a default to multiple choice but you can just click the down arrow to view other options. All of the usual suspects are there: short answer, paragraph, checkboxes, drop down, linear scale, multiple choice grid, date, and time.
On the bottom of each question is the option to make the question required. You can also copy the question if that’s easier than creating a new one. And if you want to delete it, just click the trash can.
When you’re ready to share your form, click “Send.” You’ll see the option to email it to someone, get a shareable link, or get an embed code. There are also some social media options.
Collecting Responses
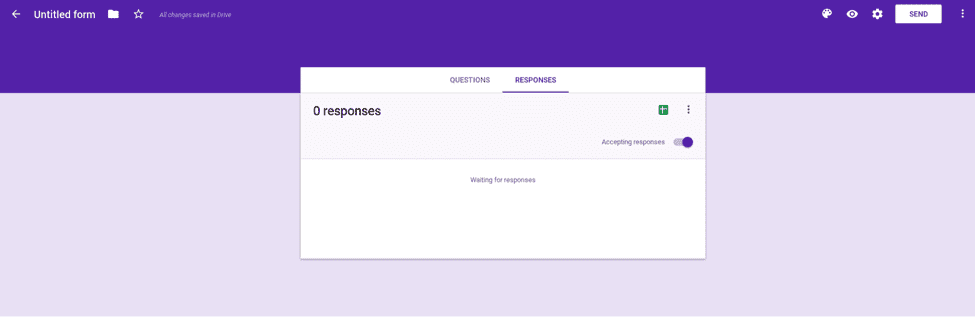
A survey is only as good as the responses it gives you, right? Click “Responses” at the top of the screen. (If you don’t see it, check to the right of the questions tab.) On this screen, you’ll see how many responses you’ve gotten since you sent your form out in the world. If you want to get those responses in a spreadsheet, click the green box with the cross on it. It will export to a Google Sheet. (If you’re not into that, you can just click download and open it in the spreadsheet plan of your choice.)